Do you want to learn how to add site in Google analytics? If yes, you’re on right place. Follow step by step procedure explained in this tutorial. After that you’ll be able to add website on Google analytics.
Step 1: Sign up on Google Analytics
If you already have google analytics account it’s OK. Otherwise, create an account on google analytics.
Step 2: Creating a new Account & Property
- Click on “Admin” tab from menu bar displaying on left side.

- Now you’re in “Admin” configurations panel.
- Click on blue button displaying text “+ Create Account“. Create a new account after entering required information. You can create 100 properties against one account.
- Click on blue button displaying text + Create Property.

Property configurations in Google Analytics
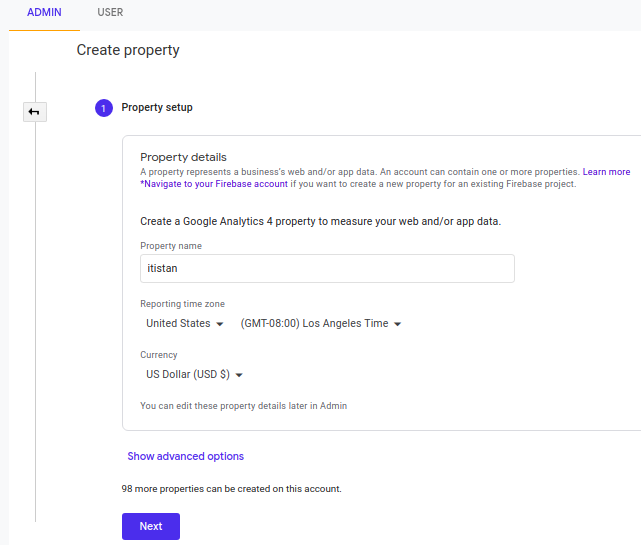
- Enter “Property Name” in text field.
- Set “Reporting Time Zone” according to your locality.
- Set “Currency” and click on “Next” button.

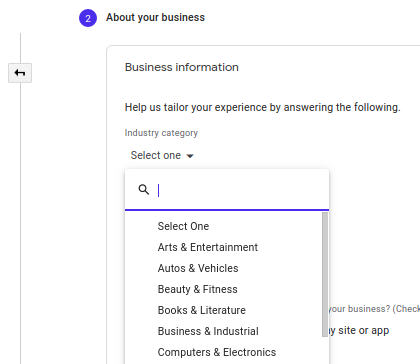
- After clicking on “Next” button, add your business details. First of all, select relevant industry for your website.

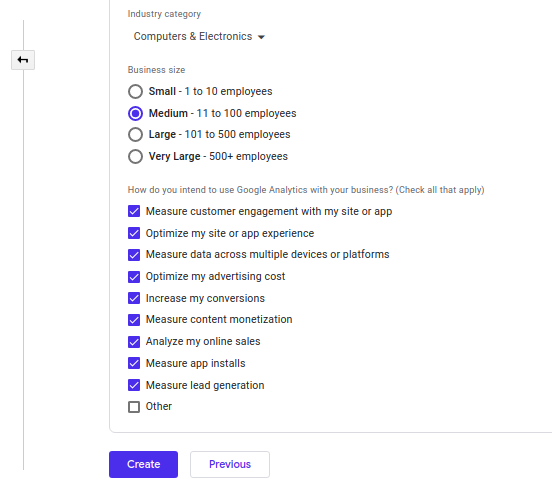
- Select your business size and check all the relevant reasons due to which you’re linking your site with google analytics.
- Click on “Create” button.

Data Stream Setup for Data Collection
- Choose a platform as a “Data Stream“. Google analytics will use this data stream to collect data.
- Click on web if you want to setup your website on Google analytics.

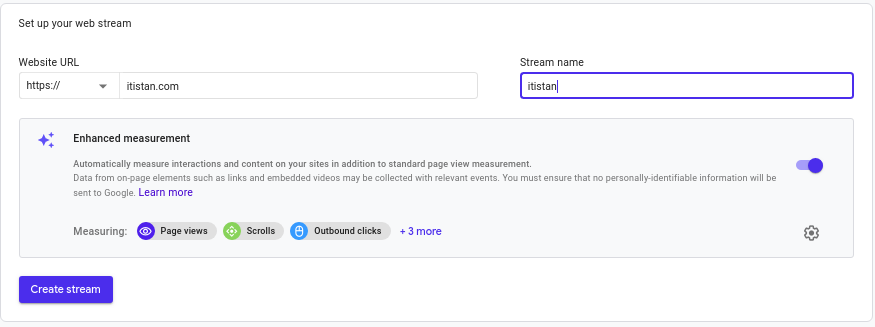
- After clicking on “Web“, a new tab appears. Enter your website URL and name as shown in picture given below:

- Click on “Create stream” button.
Step 3: Add Google Analytics code on your website
- After clicking on “Create Stream” button, a new tab appears.
- Go to “Tagging instructions” section.
- Click on “Global Site Tag (gtag.js)”, a code snippet will appear.
- Copy this code and paste into the <head> section of your homepage.

Congratulations!
After pasting “Google analytics code” in <head> section, your site data will appear in Google Analytics dashboard within few hours. Maybe, it’ll take 48 hours or more.
There you go. Keenly observe website data appearing in google analytics to improve your website performance. Keep visiting itistan for more informative tutorials.
Feel free to post your queries in comments section below if you find any difficulty in following this step-by-step tutorial. If you find this tutorial helpful, share it with your friends and social media circles.
Happy Learning 🙂
Leave a Reply